The Arms Race
Star Wars Fleet Battle Report #1
Hello, avid readers! This is the Juggerhawk once again, and welcome to my first Battle Report! This report will contain pictures and captions pertaining to the events throughout the game. Later on, I might write a short story around the events of this battle, and turn it into a more story-esque format. If you guys would like that, please tell me in the comments!
Backstory: An Imperial Convoy, consisting of 12 TIE Fighters, 3 Royal Interceptors, and an Escort Frigate under the command of Captain Darius Kree, was escorting 2 transports filled with an unknown cargo. By request of the Emperor himself, the Royal Interceptors were charged with overseeing that the shipment arrived.
The Convoy was tasked to leave from the Tallarhn System, and deliver the cargo to a Refinery on a mining asteroid near Nal Hutta. The Escort made it to the half way point when they had to exit hyperspace and alter their course. It was at this time that a Rebel fleet consisting of 19 X-Wing Pilots lead by recently promoted Mon Cala Pilot Galen Dromani exited hyperspace and ambushed the Escort. There mission was clear: Destroy the cargo and escape.
_________________________________________________________________________________

 These are our two leaders:
Captain Kree is a young naval officer and strategist, determined to be the utter victor in any situation. Surrender is never an option. Galen is also a young pilot, recently promoted to be Green Leader in his Rebel Cell. He is ambitious, and a hotshot.


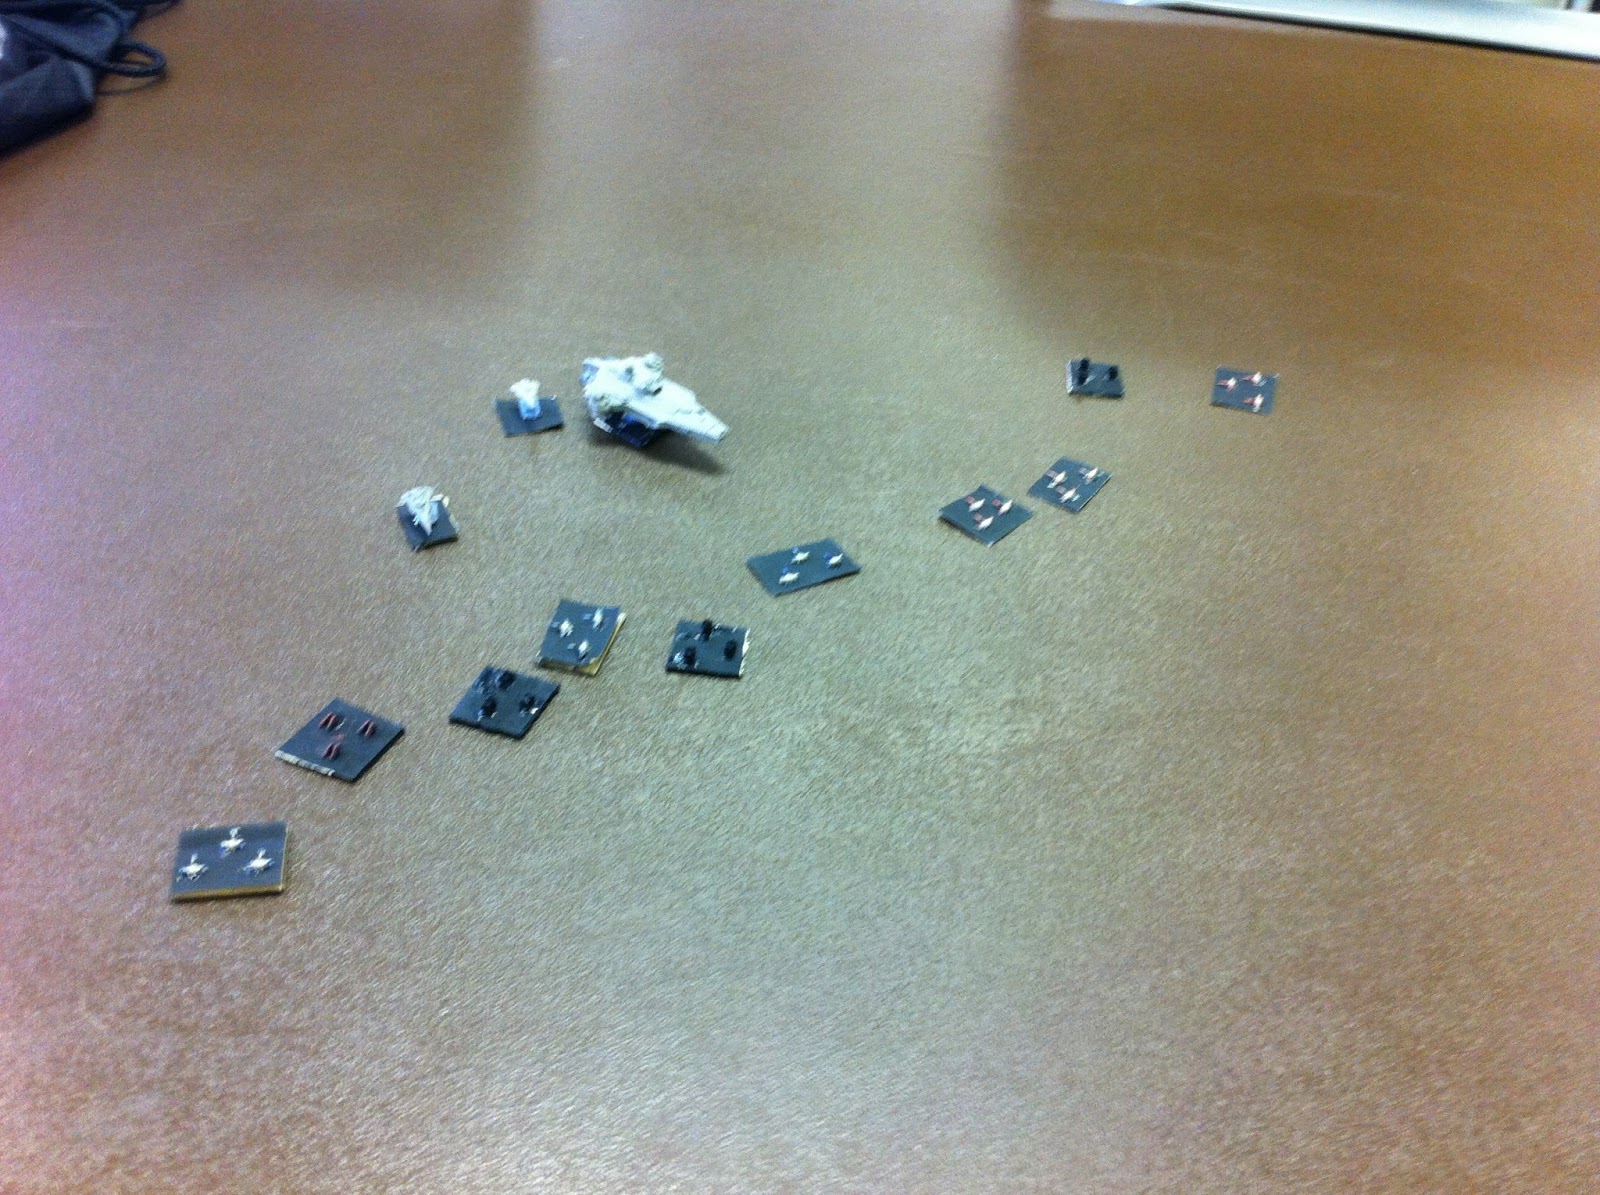
The stage for the confrontation is set: Despite the Imperials being outnumbered fighter wise, they do possess the cruiser, as well as the elite Royal Interceptors.

The Rebels play their turn turn first, dividing Red and Blue squadrons to attempt to flank the enemy. Green Leader is providing back up for Blue Leader, Desmond Mil'k, while Red Leader, Drek, leads his team in the other direction.

 In retaliation, the Imperials quickly scramble their forces. The 12 Fighters split up to engage the rebel forces, with the Royal Guard reinforcing the left flank. While the fighters move, they make sure to leave room for the 4 Turrets on the Cruiser to shoot at the X-Wings.
While Red Squadron continued on their course, Blue Squadron took a risky move: They split up their force to assist Red Squadron and attack the TIEs head on. This, however, lead to the Imperials targeting the young leader

Galen Dromani would be the first Rebel Pilot to be shot down. The TIE Pilot who shot him hit his cockpit directly, where not even the ship's shields could protect him from erupting into a fireball. His death was quick, and painless.

His death, however, was not in vain. Blue Squadrons separation allowed for one of the TIE Units to be destroyed almost instantly, leaving only one TIE Unit to defend the Right Flank. Thinking quickly, Kree sent both of the transports to the most secure side.
Kree knows his objective is to get the Transports past the Rebels and far away enough to escape into hyperspace, allowing the cargo to reach it's destination. Kree was determined to not let the Rebels succeed. And if they were going to destroy the transports, he wouldn't let them go without a fight.


The Rebellion also knew this. Without proper leadership, they threw themselves at the Transports in an effort to take them out. While dealing minimal damage, Blue 9 (Pollard) and Red 6 (Cassian) were both killed.

That was when Blue Squadron scored a major turning point in the battle. Blue 4 (Kallil), along with Blue 5 (Mallani) and Blue 6 (Morag), destroyed one of the transports.

This victory, however, would be bittersweet. While the Transport was destroyed, a TIE Squadron killed Red 3 (Nerf), and the Frigate destroyed Blue 3 (Marcus). The Royal Guard would then finish off Red 5 (Forester) and Red 4 (Malke) in one fell swoop. Blue 8 (Piper) and Blue 2 (Callan) would also be victims to TIE Fighters.


As the battle progressed, the Rebel body count continued to pile up. Red 9 (Nova), Red 2 (Boison) and Blue 7 (Mince) would fall to Kree and the remaining 6 TIEs. Of the original 19 Rebels, only 7 remained.

The Rebels needed a miracle, as they were now outnumbered and outgunned. And that miracle came in the form of Blue Squadron. With only four of its original 9 pilots remaining, Blue 4 and his unit would single handedly destroy 2 of the TIE Squadrons. This would inevitably clear a way for Red 7 (Alex) and what was left of his unit to attack the final transport.

The final transport was almost in the clear: they were literally one turn away from the finish line, which would mean an Imperial Victory. Despite their shields being down, they knew victory was in their grasp. Except for the fact that Red Squadron was on their tail. Red 7 and Red 8 (Kootra) were hot in pursuit. The transport fired on the ships, resulting in Red 8's fighter to break apart and kill the poor pilot inside. Alex, with only one dice and a turn, made the roll. It was a 6, making the shot a direct hit. The Transport was destroyed.

This chart is the final score for the battle. Red 1 (Drek) would also be killed in the ensuing dogfight. 14 Rebel Pilots were killed, and only 5 were able to escape. The Empire suffered a heavy defeat, mainly at the hands of Blue Squadron. Only 2 TIE Fighters survived, along with Kree himself, who survived to watch as his transports were destroyed, and his enemy escape into hyperspace. Within the hour, Kree was back on Tallarhn, attempting to explain to a furious commander as to why the Emperor's shipment never arrived.
This was a fun game to play. This was my first time using these rules and mechanics, so I feel that everything played out very well! I dont feel as though any ship was over or under powered, which is always a good sign.
This only negative from the game, however, was the confusion of "Who shot who" and "How did he die". I only had pictures to recreate the battle. Which is why when I played my second battle, I actually took the time to write down who killed who in the battle.
So, despite sustaining severe casualties, the REBELLION is the victor.
NEXT TIME: In "Mission Number 2: The Hunt", Kree has been tasked with hunting down the Rebels who destroyed the shipment. Following in their footsteps, he has tracked them to a remote asteroid belt, where the surviving pilots must survive an onslaught from Kree and his new Black Interceptor Squadron. Who will win? Who will die?


