The Head of the Hydra
Star Wars Fleet Battle Report #3
Howdy! Juggerhawk here again, ready to give you guys another fleet battle report! This report will, once again, be continuing the story from our last battle report. If you haven't checked it out, I recommend you do before reading this one. If you have, then please enjoy!'
Story: The leaders of Desmond's Cell have been contacted by another in a nearby system. The Cell reports that a transport was disabled and abandoned near an old nebula. The interesting part was it was carrying a Cargo similar to that of the ones the original Rebels shot down. So, the two Cells combine their forces to move in and capture the Transport. Little do they know that the Empire will be waiting....
_________________________________________________________________________________


Our four Rebel heroes today (Starting from left to right). We have Kareda, leader of Red Squadron and the second Rebel Cell, followed by John Cage, hotshot leader of yellow Squadron. Assisting from Kareda's Cell is Baran, a Doros pilot and leader of Green Squadron. And finally, Desmond is once again leading the elite Blue Squadron, with Kallil and Mallani, the other survivors from the first mission, as members of his unit.


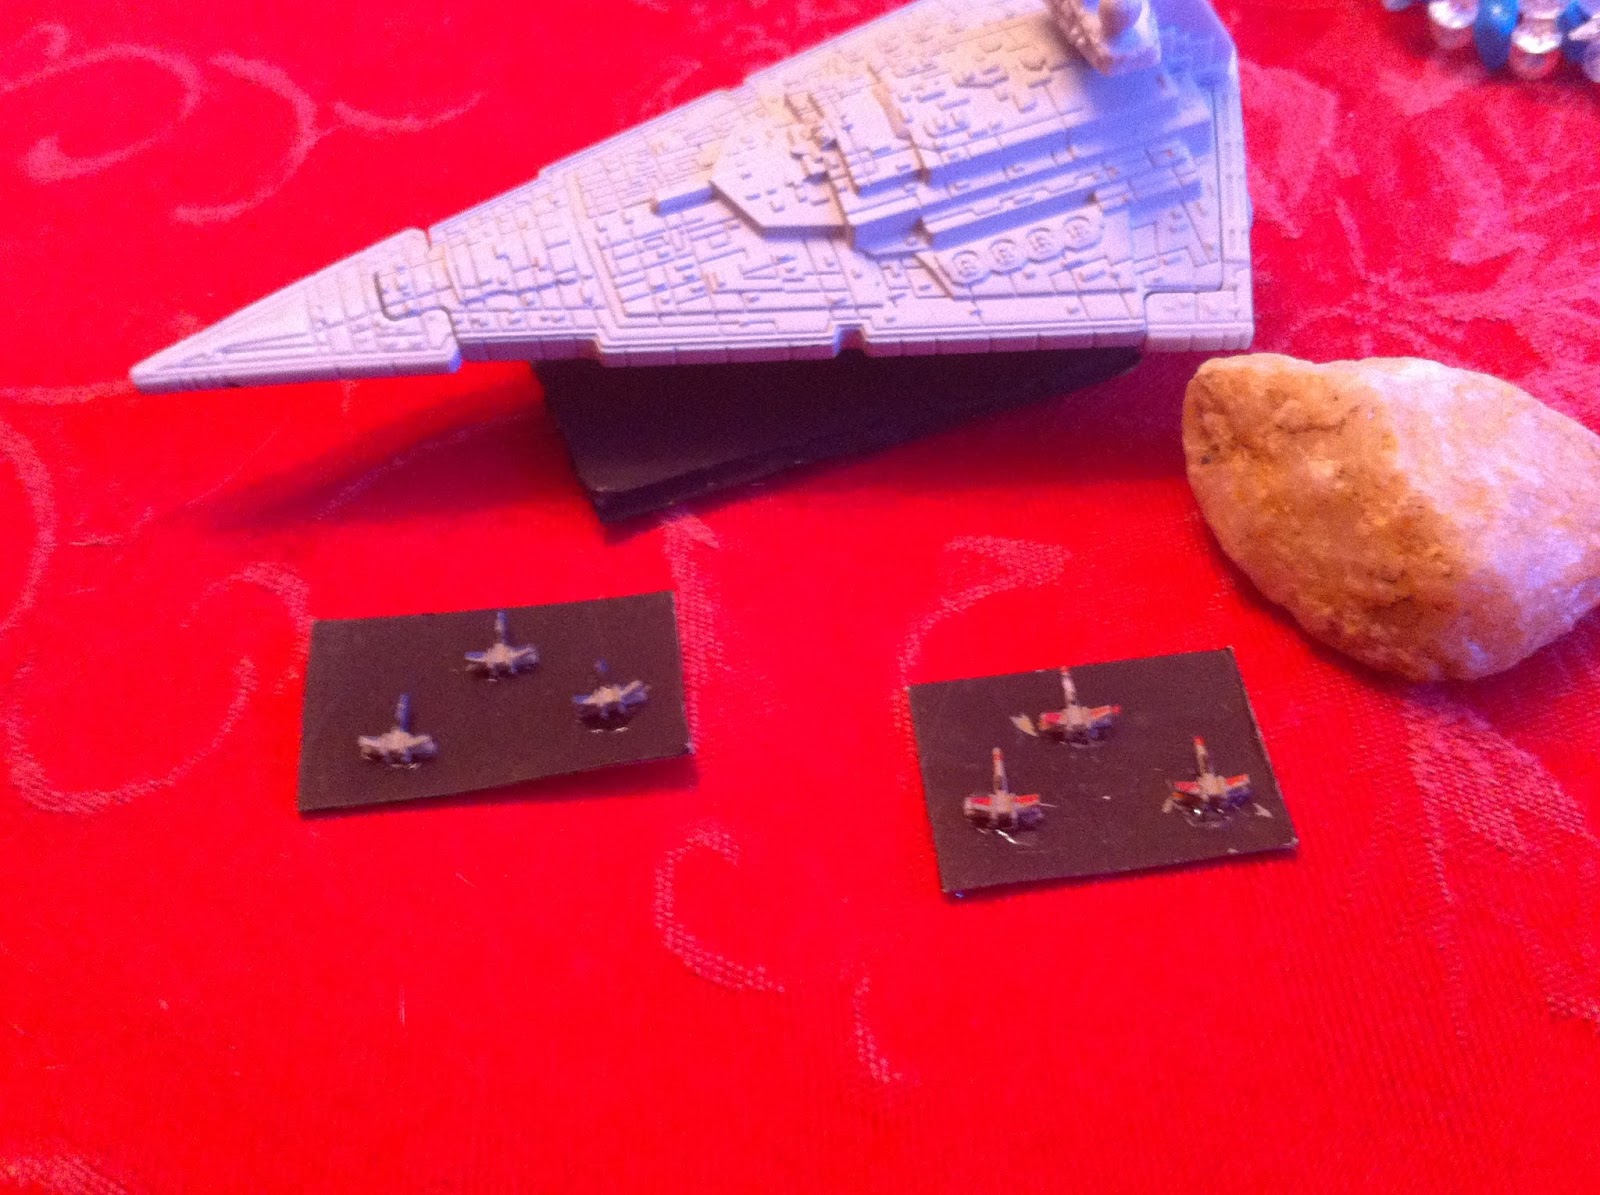
Leading our Imperial Attack Force is Commander Maltra and Admiral Trens, each heading up The Kasmir and the Black Hand. Leading our normal TIE Force is Baron Ulton, an Elite TIE Fighter Pilot. He will be assisted by 11 other TIES and an Interceptor Squadron.

 Here is our Rebel Fleet: 4 X-Wing Squadrons (Blue, Red, Green, and Yellow). There are 6 fighters in each squadron, with the exception of Yellow. Cage and his two wingmen are tasked with escorting the Yellow Bomber Squadron.

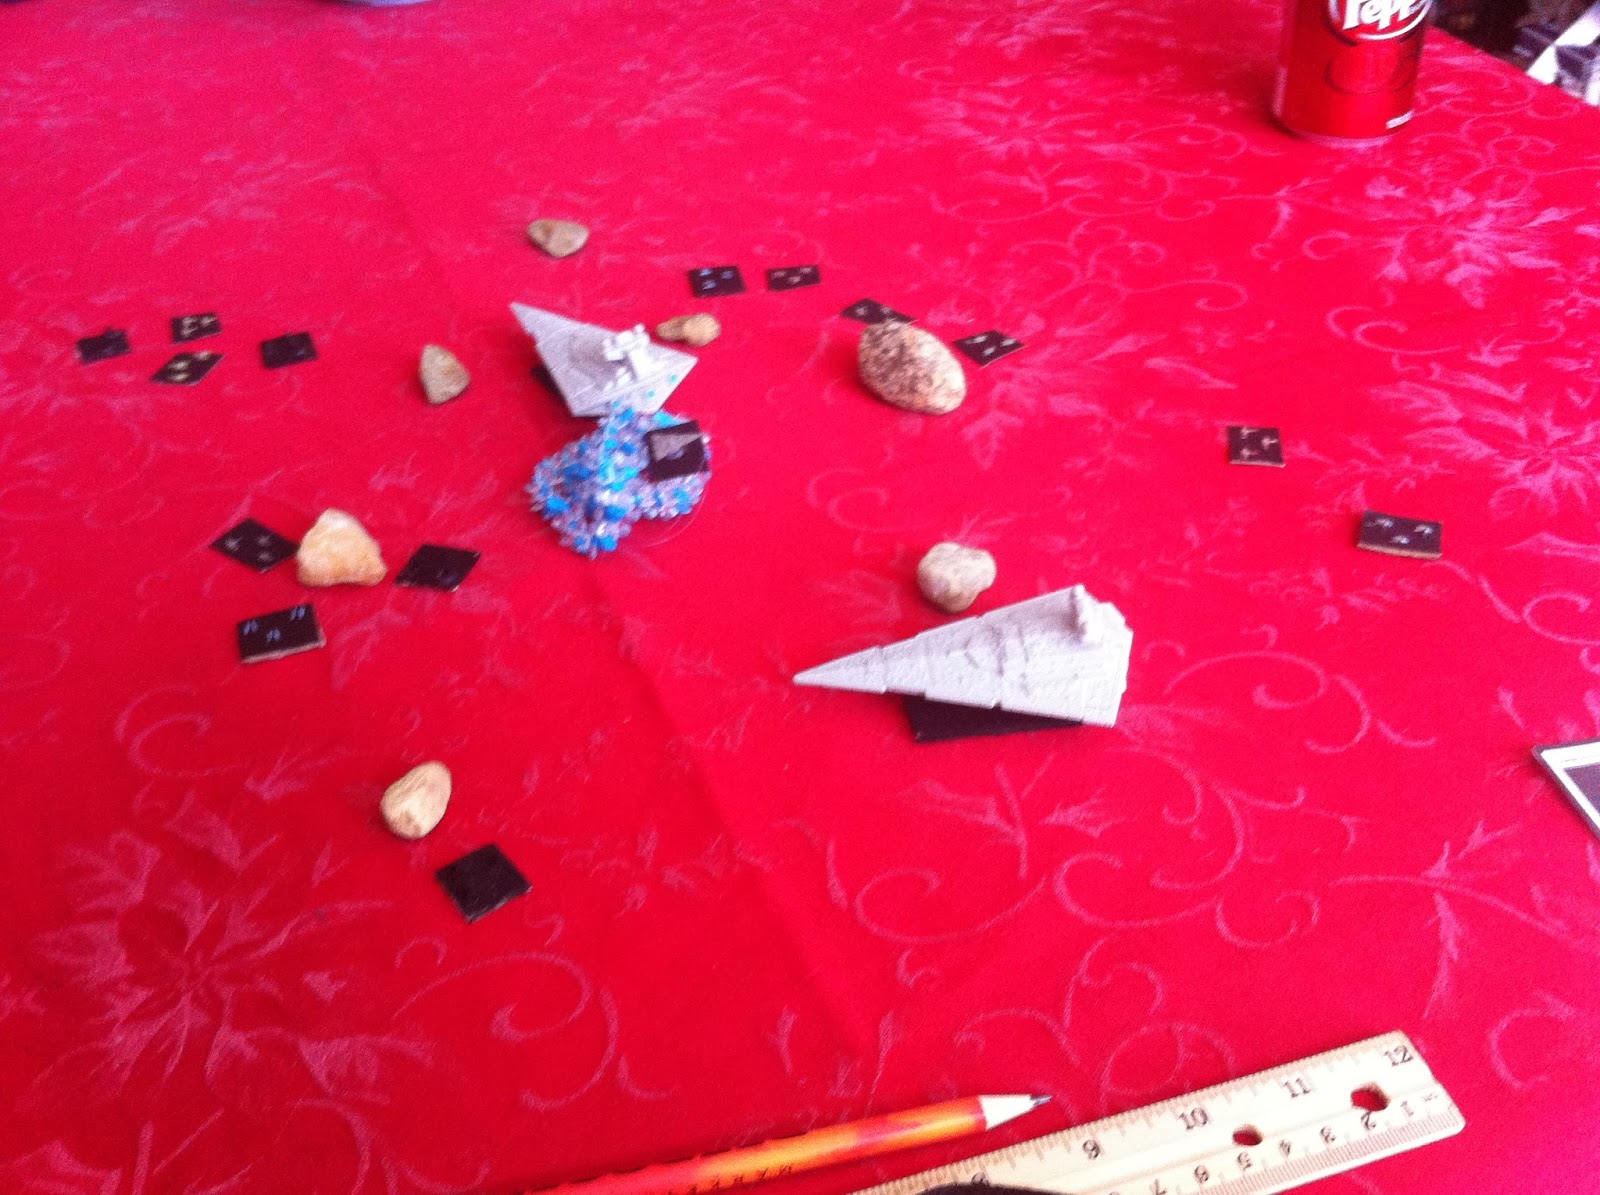
 The Imperial fleet exits hyperspace on the other end of the table. Ulton and his TIEs all exit the Destroyers, while the Interceptors, nicknamed Phantom Squadron, fly on ahead to try and gain a foothold in the center before the Rebels.


The Empire moves first. The Phantoms fire ahead, the fastest of all of the Imperial Craft, the TIEs following behind.

The Rebels follow this up by making their way to the asteroid as well, mainly staying in formation with Blue 1 taking the lead. It would be at this point that the Rebels realized that the Imperials would be awaiting them.


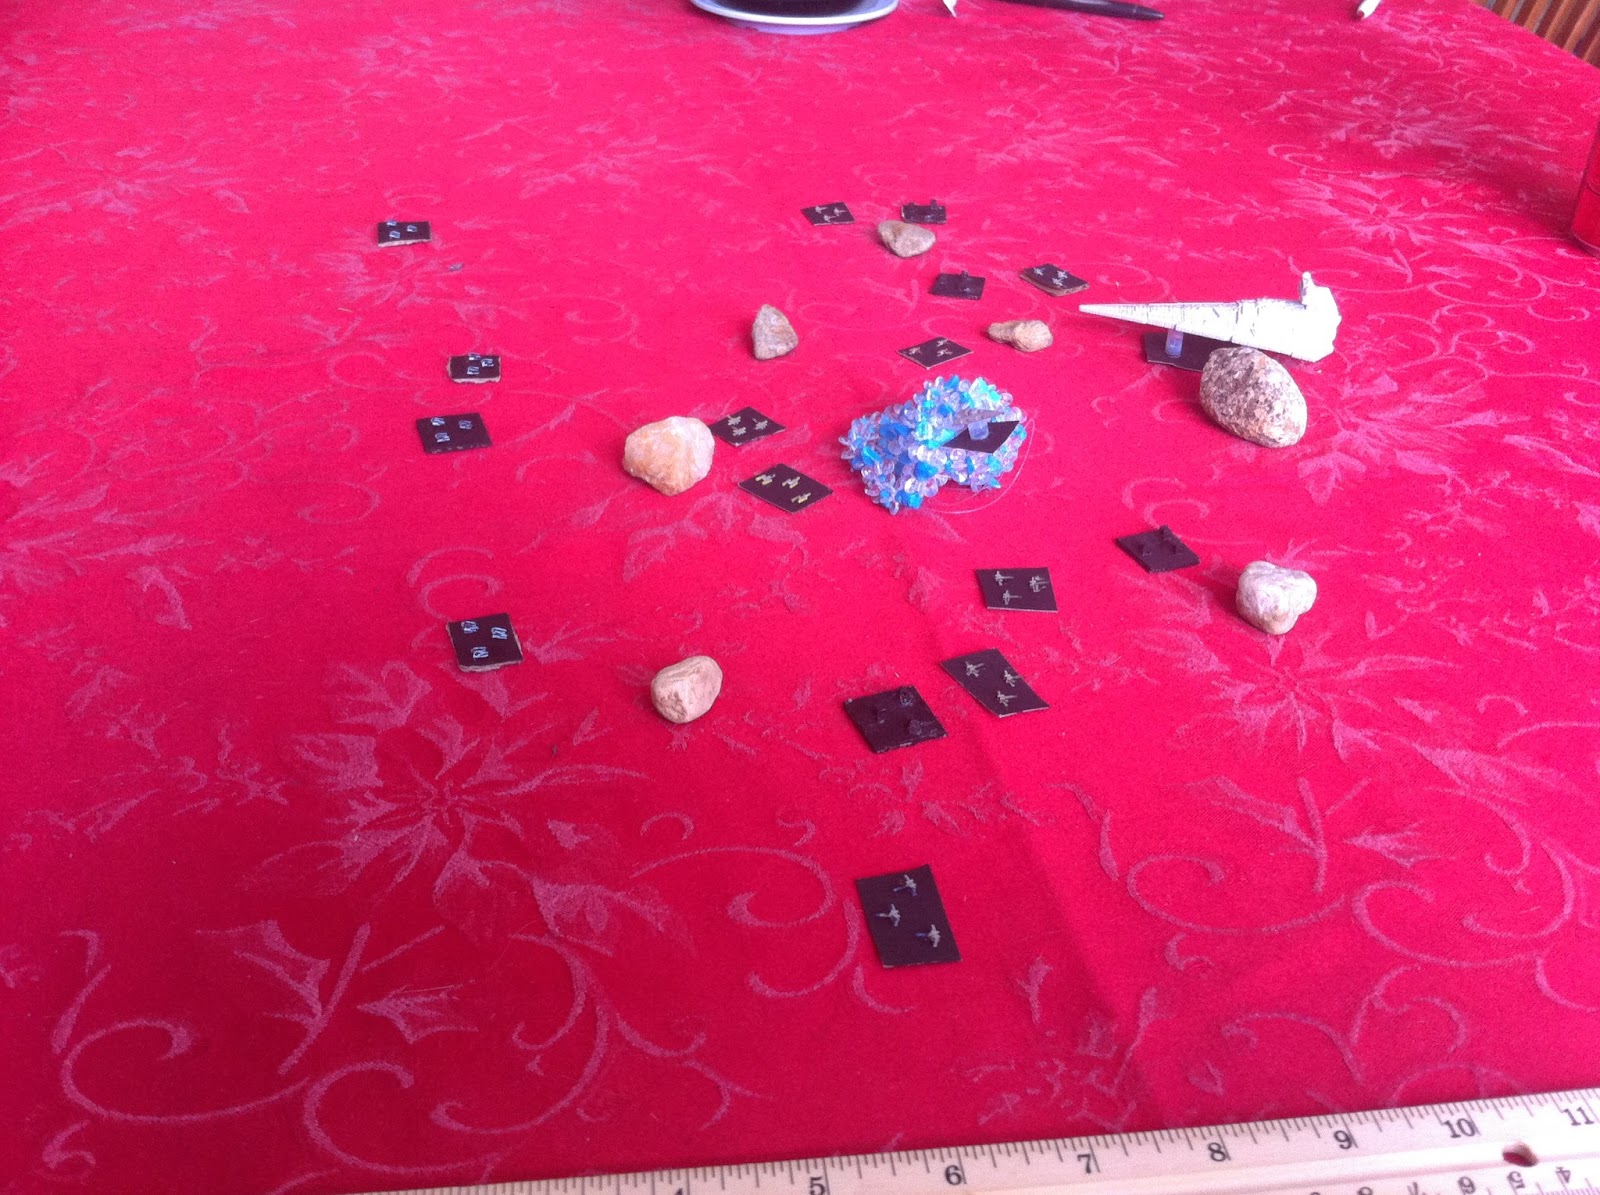
As the Imperials take their next turn, I demonstrate how the movement works: The string measures 7", which is the max distance an Interceptor Squadron can move.


As the Rebel Pilots move next, they encounter and strike first against the Imperial Interceptors. Blue 1 (Desmond) and Blue 2 (Kallil) take down Phantom's 12 and 11 in a single strike, while Blue 6 (Talmar) promptly shoots down Phantom 3. The picture on the left is meant to show how 'Strafing' works. Strafing is when the attack turn occurs during the movement turn: the ship in question, so long as his movement overlaps that of the enemy, can do an attack pass.


As of the next Imperial turn, 3 Phantoms are destroyed. The other pilots are not as fortunate with their shots. Ulton's TIEs, on the other hand, make a move on Desmond's unit, not killing any fighters, but taking out the shields of Blue 2 (Kallil) and 3 (Mallani).


The Rebels continue to maneuver near the Nebula: with Cage attempting to protect the Y-Wings, and Green Squadron preparing to attack the TIEs. No Casualties yet.

 The Imperial Command began to divide up the field, with Maltra heading to the right of the Nebula, and Trens to the Left. It is at this point that Trens, using his long ranged turbolasers, deals the first blow to the Rebellion: Blue 3 (Mallani), who was a survivor from the first battle.


TIE 7 would deal the next blow as he strafes Green 3 (Falar), flying by after shooting the pilot through his cockpit window. Commander Maltra would also fire onto Blue 6 (Talmar), ending another Pilots life.

 At first, the Phantoms rushing by and getting 3 of their number killed seemed to be an error on the Imperial Part. At this point, however, it seems to be paying off, as the Interceptors are now behind the Rebels, sandwiching them between themselves and the Star Destroyers.


As the Interceptors reenter the the field, one of the primary targets is the fighters that could destroy the Capital ships: The Bombers. As the interceptors close in, none of them can seem to landing a killing blow, instead only taking out the shields of two of the bombers. The same, however, could not be said for Red 3 (Morcel), as he is hit by heavy turbo-laser fire from Maltra's ship, the Black Hand.


Things are looking Grim for our Rebels. Maltra's ship has entered the belt, with Tren's on the outside firing on stragglers and those sandwiched in between. While the Ulton's TIES continue to circle like vultures and pick off the Rebels, the Rebels attempt to circle and regroup. Green Leader attempts a strafing run on Maltra's Cruiser, landing some direct hits on its starboard side and lowering its shields.


Ulton's TIEs and the Phantom interceptors continue there runs, with Phantom Leader taking out the second to last veteran from The Arms Race, Blue 2 (Kallil). The TIEs start to close in on Yellow Squadron, attacking the escort and killing Yellow 2 (Salarni), leaving Cage as the final Yellow Squadron Fighter Pilot. As of this point, the Y-Wings are all still alive.

Green 6 (Dolph) is the next to be killed, shot by Maltra's stream of laser fire. While Maltra is dealing heavy amounts of damage to our pilots, he is also making a mistake that Tren's is able to avoid: entering the Asteroid Field. While Tren's can maneuver and turn with ease, Maltra is stuck having to maneuver in the small confines of the field.


As of this point, 8 of the 24 Rebel Pilots are dead, with several others having lost their shields. 10 Imperial Pilots are dead, most of them being the Interceptors. Ulton's TIEs have been holding their own, proving his superior leadership compared to Fenn Ramus.


The Rebels use there next turn to try and deal some damage to the Star Destroyers: with Blue Squadron dealing the first blow to Tren's shields, and Kareda's unit finishing off what was left of Maltra's shields, leaving his Shield generators vulnerable to attack.


The Imperial Turn results in the death of Green 5 (Jackie) and Red 6 (Orgon). Besides that, Ulton's TIEs are unable to deal any killing blows to the Fighters, or Y-Wings. In return, however, Desmond (The sole survivor of his unit), along with Y-Wing 2 (Saladin) destroy TIEs 11 and 10. With most of his squadron also destroyed, Desmond is now fighting alongside the other single hero pilot, Cage, in defending the Y-Wings.


Ulton's TIE Unit closes in, with Ulton killing Green 4 (Famis). The situation is continuing to look grimmer for our Rebels as they are slowly picked apart, whether from the circling TIEs or the superior Cruisers. Even Desmond, who has won nothing but victories so far, is starting to have doubts about the Rebels chances. Cage, on the other hand, is still filled with confidence, fueled by both his hatred and cockiness.


Kareda's unit, who has slowly been prodding away at Maltra's defences, has finally been able to destroy both of his Shield Generators, making the proud Imperial Commander a tad nervous, as his ship is now unprotected. Y-Wing 2 (Saladin) is able to use his swivel turret to kill yet another Imperial Pilot.


The triumph in Kareda's smirk is gone almost as soon as it comes, with Ulton himself shooting down Red 4 (Trenton), as well as another of his pilots killing Blue 4 (Marasi). With the Rebel body count growing to disastrous lengths, Tren's is already viewing this situation as a won battle, especially as his gunners take down Green 2 (Kilis), while Maltra is still too concerned about his depleted shields to really care.


Desmond, the last pilot of Blue Squadron, along with Kareda, destroy the final Imperial TIE targetting the Y-Wings. The damage, however, is already done. Despite not destroying any of the bombers, the TIEs have kept them away from the capital ships all game. This would result in the devastating massacre, with Maltra and Trens being responsible for 6 of the Rebel deaths.
 Cage, who has been making his away around the asteroid belt, destroys one of the few remaining TIE squadrons defending Maltra's Cruiser, leaving it open to attack. This, however, would be Cage's last kill, as the hotshot pilot is then destroyed in a flurry of frantic laser fire from Maltra. His death was slow as, while remaining conscious, his X-Wing erupts in flames, crashing into the side of Maltra's cruiser.
 With horror and anger flowing through them, the 7 remaining pilots throw themselves at the Star Destroyers. The Bombers fire Ionic bombs upon Trens, the repeated blasts acting as an EMP as his cruiser is rendered completely disabled. As Trens screams at his men to turn auxilary power on, Desmond, Kareda, and Malan (Red 2), attack Trens' hangar, destroying it. As they were not close enough to destroy the bridge, Trens was allowed to survive another day.

The same, however, could not be said for Commander Maltra. In an act of both great courage and stupidity, Balan, the final fighter of Green Squadron, launches a proton torpedo at the Star Destroyers bridge while strafing. Maltra could only watch with resigned disbelief as a 6 was rolled, and the warhead collided into the bridge, ending the life of Commander Maltra. As the Fighter triumphantly flies past the destroyer's burning bridge, however, Ulton flies behind him and kills the Rebel hero.
 As Trens watches the Black Hand from a distance, shaking his head in mild annoyance at the death of his counterpart, power is restored to the Kasmir, and starts firing at the final 5 Rebel Pilots. With the Y-Wings having exhausted all of their Ion Bombs on Trens, and the moral of the 3 remaining fighters on the verge of collapse, Desmond calls a retreat. With shaky hands and a tear in one eye, Desmond pulls the lever, himself leading the retreat into hyperspace, leaving behind the bodies of Balan, Cage, and 16 other Rebel Pilots to their graveless deaths.

This was certainly a long and tedious battle to play out. It took the Empire 3 to 4 hours to win this victory. While both Star Destroyers are still operational, Maltra was killed, and the Black Hand will need serious repairs. Ulton proved himself in this battle, scoring a kill count of 4 Rebel Pilots. Of the Rebel Pilots, Cage scored the most kills, taking out 5 Imperials before his own death. However, this can be considered the Empires first big win. We shall see how long they can maintain this streak.
Next Time: With both Rebel Cells involved with the failed adventure depleted and licking their wounds, Trens has been placed in sectional command of his and Malta's ships in the Tallahrn System. While the Imperial Shipments being stolen had been a major problem, the Sectional Command of that system has come across a new problem: Smugglers.
One Smuggler in particular, Zillani, a cocky and young Zabrak male, has seemed to be more elusive than others. Controlling a pirated Blockade Runner, The Wolverine, as well as a squadron of X-Wings, he has been able to elude Imperial Capture. Trens is now being tasked with putting an end to the Smugglers illegal shipments, whatever they may be.....

Story: The leaders of Desmond's Cell have been contacted by another in a nearby system. The Cell reports that a transport was disabled and abandoned near an old nebula. The interesting part was it was carrying a Cargo similar to that of the ones the original Rebels shot down. So, the two Cells combine their forces to move in and capture the Transport. Little do they know that the Empire will be waiting....
_________________________________________________________________________________


Our four Rebel heroes today (Starting from left to right). We have Kareda, leader of Red Squadron and the second Rebel Cell, followed by John Cage, hotshot leader of yellow Squadron. Assisting from Kareda's Cell is Baran, a Doros pilot and leader of Green Squadron. And finally, Desmond is once again leading the elite Blue Squadron, with Kallil and Mallani, the other survivors from the first mission, as members of his unit.


Leading our Imperial Attack Force is Commander Maltra and Admiral Trens, each heading up The Kasmir and the Black Hand. Leading our normal TIE Force is Baron Ulton, an Elite TIE Fighter Pilot. He will be assisted by 11 other TIES and an Interceptor Squadron.

 Here is our Rebel Fleet: 4 X-Wing Squadrons (Blue, Red, Green, and Yellow). There are 6 fighters in each squadron, with the exception of Yellow. Cage and his two wingmen are tasked with escorting the Yellow Bomber Squadron.
 The Imperial fleet exits hyperspace on the other end of the table. Ulton and his TIEs all exit the Destroyers, while the Interceptors, nicknamed Phantom Squadron, fly on ahead to try and gain a foothold in the center before the Rebels.

The Empire moves first. The Phantoms fire ahead, the fastest of all of the Imperial Craft, the TIEs following behind.

The Rebels follow this up by making their way to the asteroid as well, mainly staying in formation with Blue 1 taking the lead. It would be at this point that the Rebels realized that the Imperials would be awaiting them.


As the Imperials take their next turn, I demonstrate how the movement works: The string measures 7", which is the max distance an Interceptor Squadron can move.


As the Rebel Pilots move next, they encounter and strike first against the Imperial Interceptors. Blue 1 (Desmond) and Blue 2 (Kallil) take down Phantom's 12 and 11 in a single strike, while Blue 6 (Talmar) promptly shoots down Phantom 3. The picture on the left is meant to show how 'Strafing' works. Strafing is when the attack turn occurs during the movement turn: the ship in question, so long as his movement overlaps that of the enemy, can do an attack pass.


As of the next Imperial turn, 3 Phantoms are destroyed. The other pilots are not as fortunate with their shots. Ulton's TIEs, on the other hand, make a move on Desmond's unit, not killing any fighters, but taking out the shields of Blue 2 (Kallil) and 3 (Mallani).


The Rebels continue to maneuver near the Nebula: with Cage attempting to protect the Y-Wings, and Green Squadron preparing to attack the TIEs. No Casualties yet.


TIE 7 would deal the next blow as he strafes Green 3 (Falar), flying by after shooting the pilot through his cockpit window. Commander Maltra would also fire onto Blue 6 (Talmar), ending another Pilots life.
 At first, the Phantoms rushing by and getting 3 of their number killed seemed to be an error on the Imperial Part. At this point, however, it seems to be paying off, as the Interceptors are now behind the Rebels, sandwiching them between themselves and the Star Destroyers.

As the Interceptors reenter the the field, one of the primary targets is the fighters that could destroy the Capital ships: The Bombers. As the interceptors close in, none of them can seem to landing a killing blow, instead only taking out the shields of two of the bombers. The same, however, could not be said for Red 3 (Morcel), as he is hit by heavy turbo-laser fire from Maltra's ship, the Black Hand.


Things are looking Grim for our Rebels. Maltra's ship has entered the belt, with Tren's on the outside firing on stragglers and those sandwiched in between. While the Ulton's TIES continue to circle like vultures and pick off the Rebels, the Rebels attempt to circle and regroup. Green Leader attempts a strafing run on Maltra's Cruiser, landing some direct hits on its starboard side and lowering its shields.


Ulton's TIEs and the Phantom interceptors continue there runs, with Phantom Leader taking out the second to last veteran from The Arms Race, Blue 2 (Kallil). The TIEs start to close in on Yellow Squadron, attacking the escort and killing Yellow 2 (Salarni), leaving Cage as the final Yellow Squadron Fighter Pilot. As of this point, the Y-Wings are all still alive.

Green 6 (Dolph) is the next to be killed, shot by Maltra's stream of laser fire. While Maltra is dealing heavy amounts of damage to our pilots, he is also making a mistake that Tren's is able to avoid: entering the Asteroid Field. While Tren's can maneuver and turn with ease, Maltra is stuck having to maneuver in the small confines of the field.

As of this point, 8 of the 24 Rebel Pilots are dead, with several others having lost their shields. 10 Imperial Pilots are dead, most of them being the Interceptors. Ulton's TIEs have been holding their own, proving his superior leadership compared to Fenn Ramus.


The Rebels use there next turn to try and deal some damage to the Star Destroyers: with Blue Squadron dealing the first blow to Tren's shields, and Kareda's unit finishing off what was left of Maltra's shields, leaving his Shield generators vulnerable to attack.


The Imperial Turn results in the death of Green 5 (Jackie) and Red 6 (Orgon). Besides that, Ulton's TIEs are unable to deal any killing blows to the Fighters, or Y-Wings. In return, however, Desmond (The sole survivor of his unit), along with Y-Wing 2 (Saladin) destroy TIEs 11 and 10. With most of his squadron also destroyed, Desmond is now fighting alongside the other single hero pilot, Cage, in defending the Y-Wings.


Ulton's TIE Unit closes in, with Ulton killing Green 4 (Famis). The situation is continuing to look grimmer for our Rebels as they are slowly picked apart, whether from the circling TIEs or the superior Cruisers. Even Desmond, who has won nothing but victories so far, is starting to have doubts about the Rebels chances. Cage, on the other hand, is still filled with confidence, fueled by both his hatred and cockiness.


Kareda's unit, who has slowly been prodding away at Maltra's defences, has finally been able to destroy both of his Shield Generators, making the proud Imperial Commander a tad nervous, as his ship is now unprotected. Y-Wing 2 (Saladin) is able to use his swivel turret to kill yet another Imperial Pilot.


The triumph in Kareda's smirk is gone almost as soon as it comes, with Ulton himself shooting down Red 4 (Trenton), as well as another of his pilots killing Blue 4 (Marasi). With the Rebel body count growing to disastrous lengths, Tren's is already viewing this situation as a won battle, especially as his gunners take down Green 2 (Kilis), while Maltra is still too concerned about his depleted shields to really care.


Desmond, the last pilot of Blue Squadron, along with Kareda, destroy the final Imperial TIE targetting the Y-Wings. The damage, however, is already done. Despite not destroying any of the bombers, the TIEs have kept them away from the capital ships all game. This would result in the devastating massacre, with Maltra and Trens being responsible for 6 of the Rebel deaths.

 With horror and anger flowing through them, the 7 remaining pilots throw themselves at the Star Destroyers. The Bombers fire Ionic bombs upon Trens, the repeated blasts acting as an EMP as his cruiser is rendered completely disabled. As Trens screams at his men to turn auxilary power on, Desmond, Kareda, and Malan (Red 2), attack Trens' hangar, destroying it. As they were not close enough to destroy the bridge, Trens was allowed to survive another day.
The same, however, could not be said for Commander Maltra. In an act of both great courage and stupidity, Balan, the final fighter of Green Squadron, launches a proton torpedo at the Star Destroyers bridge while strafing. Maltra could only watch with resigned disbelief as a 6 was rolled, and the warhead collided into the bridge, ending the life of Commander Maltra. As the Fighter triumphantly flies past the destroyer's burning bridge, however, Ulton flies behind him and kills the Rebel hero.
 As Trens watches the Black Hand from a distance, shaking his head in mild annoyance at the death of his counterpart, power is restored to the Kasmir, and starts firing at the final 5 Rebel Pilots. With the Y-Wings having exhausted all of their Ion Bombs on Trens, and the moral of the 3 remaining fighters on the verge of collapse, Desmond calls a retreat. With shaky hands and a tear in one eye, Desmond pulls the lever, himself leading the retreat into hyperspace, leaving behind the bodies of Balan, Cage, and 16 other Rebel Pilots to their graveless deaths.
This was certainly a long and tedious battle to play out. It took the Empire 3 to 4 hours to win this victory. While both Star Destroyers are still operational, Maltra was killed, and the Black Hand will need serious repairs. Ulton proved himself in this battle, scoring a kill count of 4 Rebel Pilots. Of the Rebel Pilots, Cage scored the most kills, taking out 5 Imperials before his own death. However, this can be considered the Empires first big win. We shall see how long they can maintain this streak.
Next Time: With both Rebel Cells involved with the failed adventure depleted and licking their wounds, Trens has been placed in sectional command of his and Malta's ships in the Tallahrn System. While the Imperial Shipments being stolen had been a major problem, the Sectional Command of that system has come across a new problem: Smugglers.
One Smuggler in particular, Zillani, a cocky and young Zabrak male, has seemed to be more elusive than others. Controlling a pirated Blockade Runner, The Wolverine, as well as a squadron of X-Wings, he has been able to elude Imperial Capture. Trens is now being tasked with putting an end to the Smugglers illegal shipments, whatever they may be.....